1. The track I just recorded doesn't play
If you think you're recording well but the track doesn't play, check to see if monitoring is still on. This is a very common case.
When you're done recording, turn off monitoring [1].
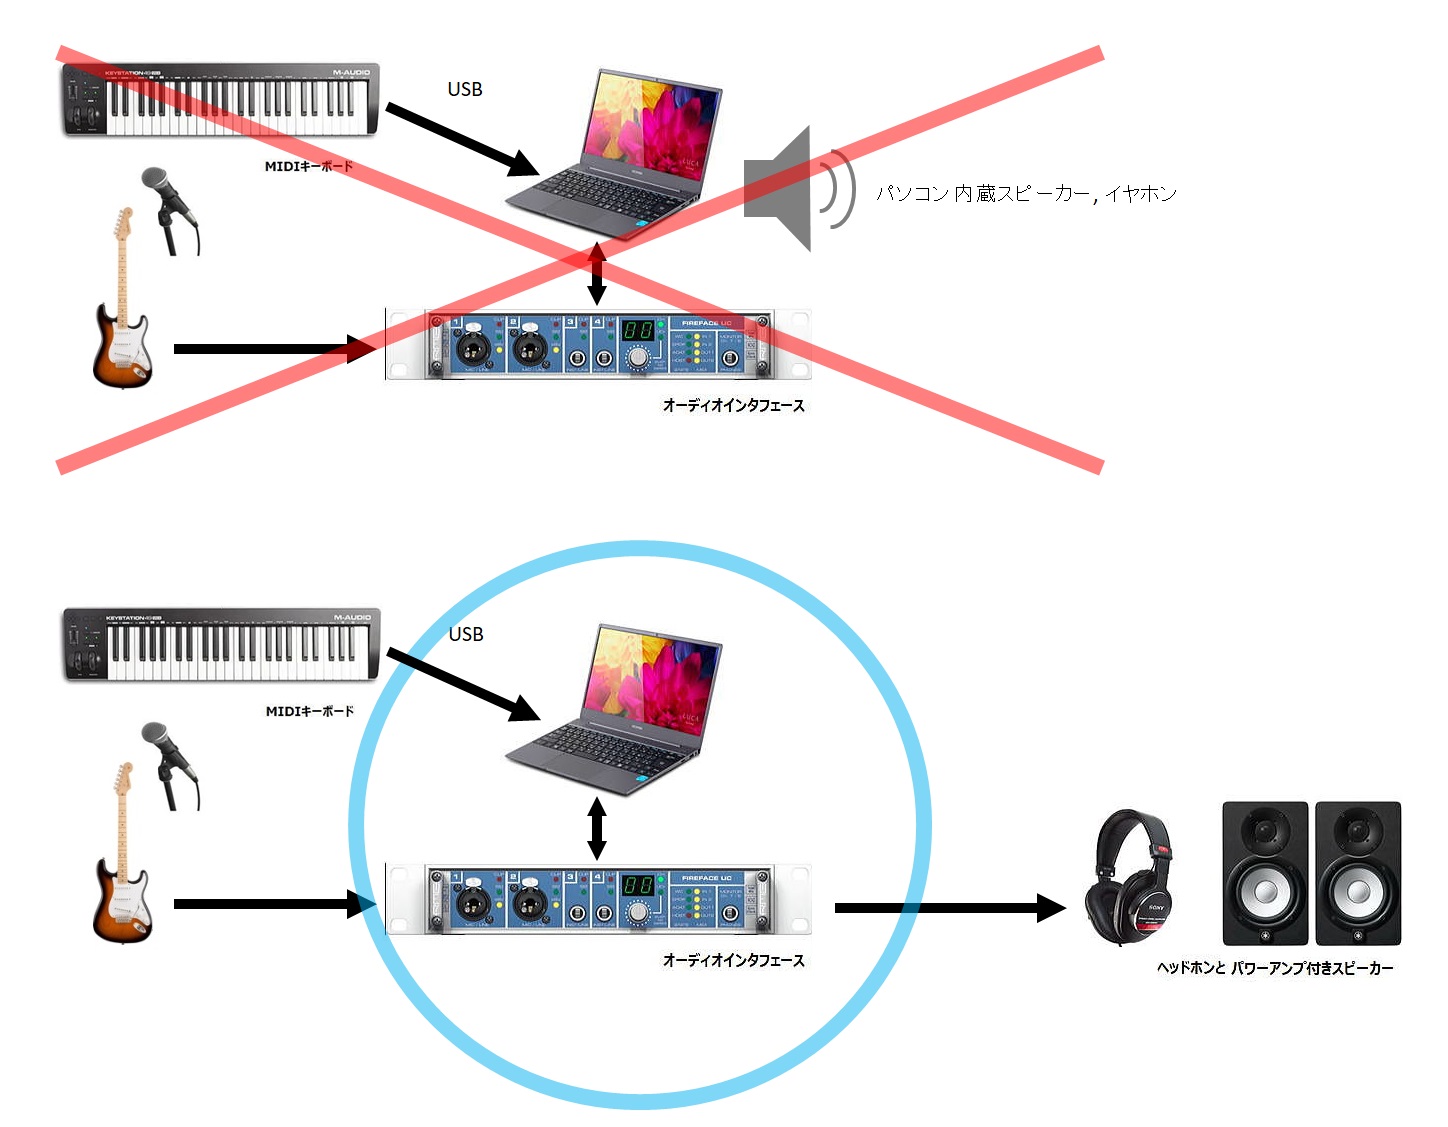
2. Are your headphones or speakers connected to an audio interface?
This is a surprisingly common case. There are many cases where the microphone and other devices are connected to the audio interface, but the output (monitor) devices are left connected to the computer.
Using an external audio interface means that audio input and output goes through the audio interface. Headphones and monitor speakers need to be connected to the audio I/F.
[Note: MIDI keyboards do not need to be connected to an audio interface]
MIDI keyboards output MIDI data, not sound. Since this is performance data and not an audio signal, there is no need to connect it to an audio interface.
Even if you connect it directly to your computer via USB, the latency is the same as when you connect it to an audio interface (in this case, the MIDI keyboard needs to have a MIDI OUT terminal).
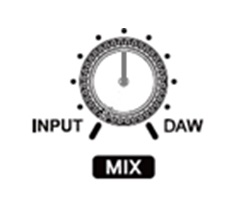
3. Check the monitor output of your audio interface
If your audio interface has a MIX knob, make sure it is set to output audio from your DAW as well.
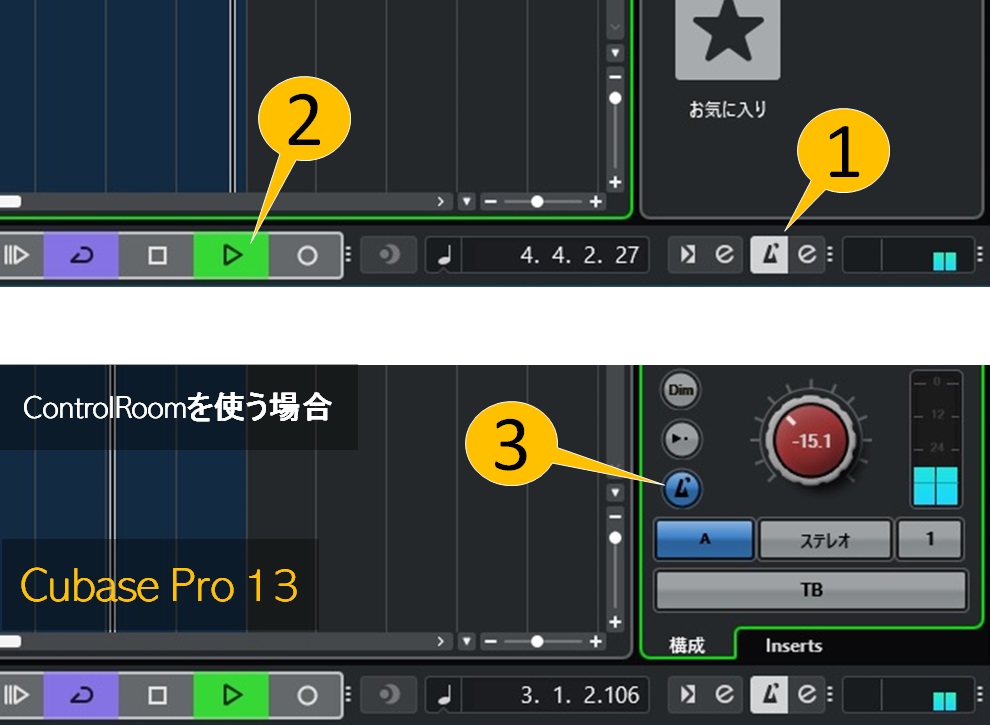
4. Is there really no sound? (Check with a metronome click)
One easy way to check that Cubase is ready to make sound is to play the metronome click. If it plays properly, there is no problem with Cubase's audio environment.
Turn on the metronome [1] and play [2]. If you are using Control Room, there is another metronome switch [3].
5. Is there really no sound? (Check by loading an audio file)
Even if the metronome click does not sound, it may sound if you load an audio file.
- "Check if Cubase can produce sound"
- This explains how to load and check a test tone audio file.
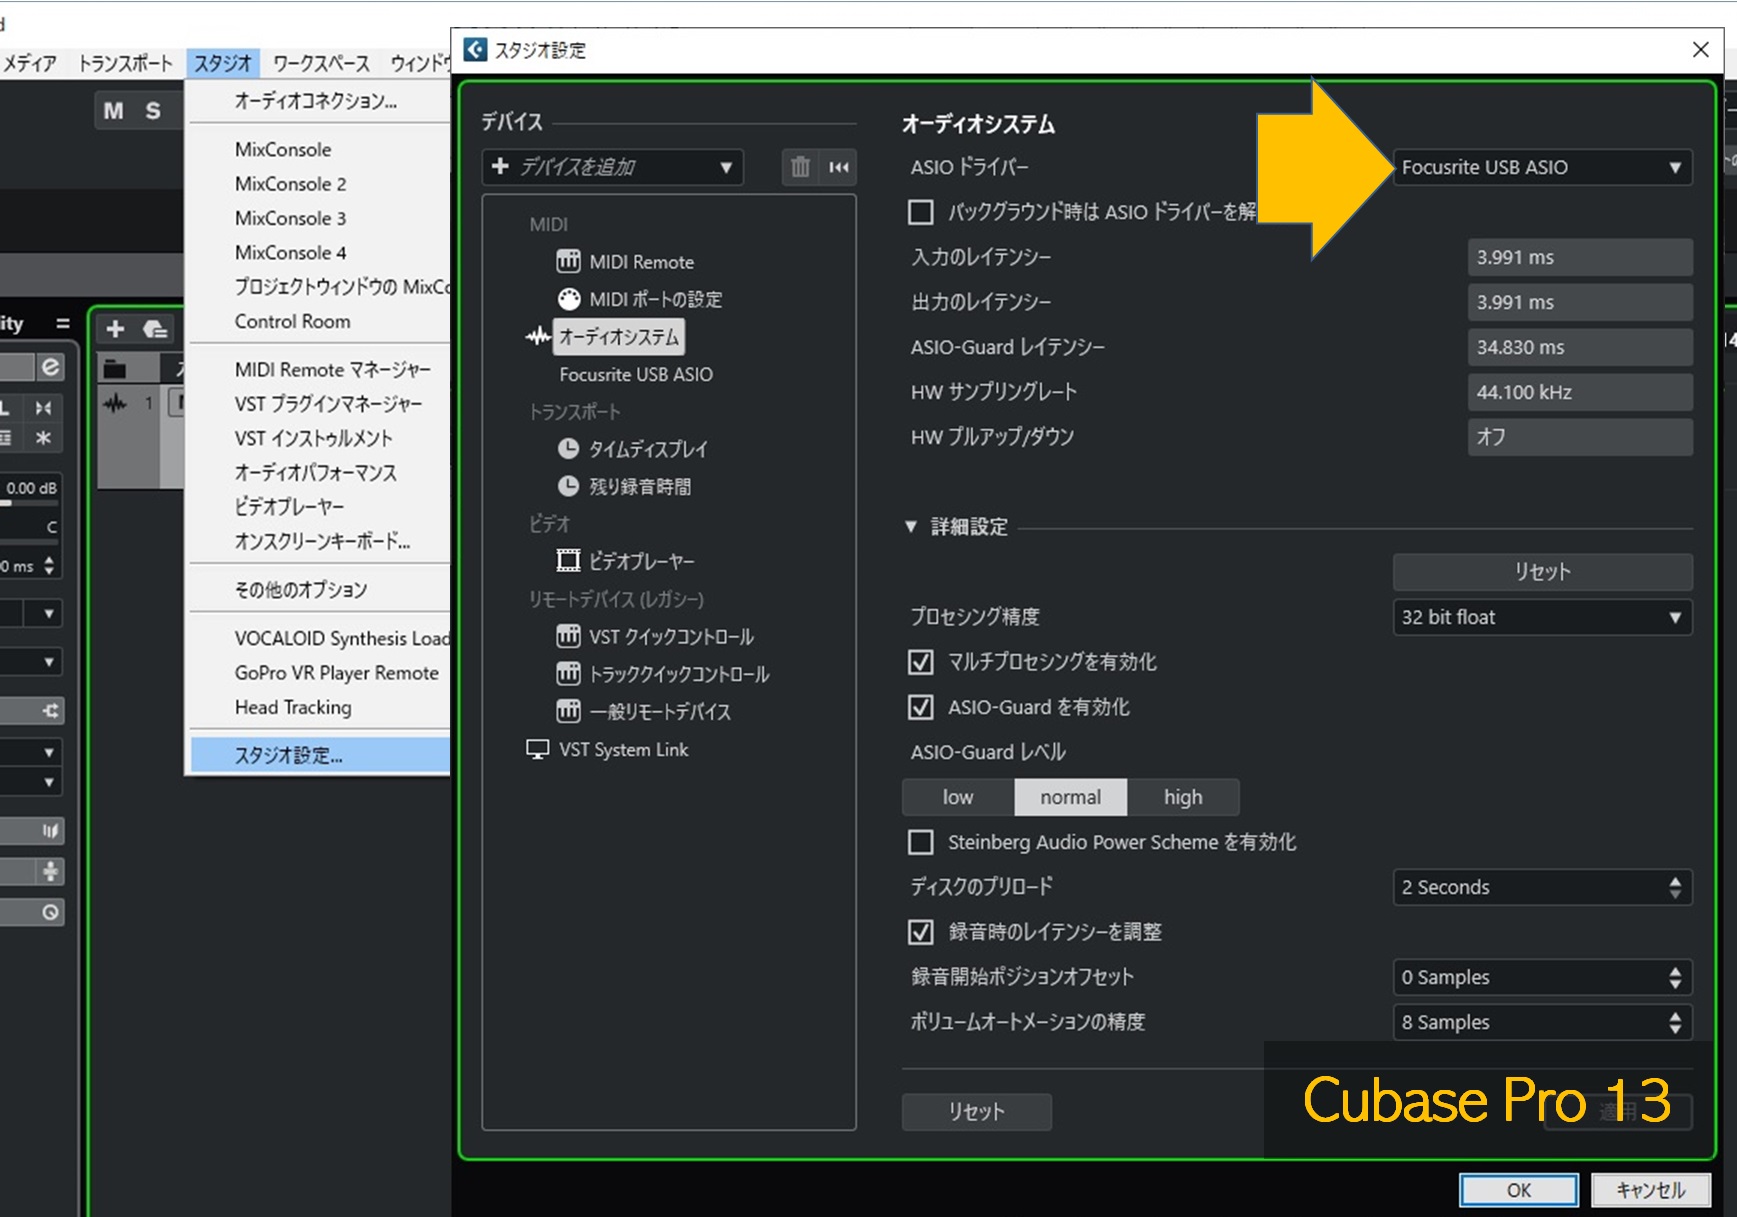
6. Check your audio driver settings
Make sure that the "ASIO driver" for the audio interface you are using is specified.
This article shows an example of using Focusrite Scarlett 2i2 (3rd Gen) as the audio interface.
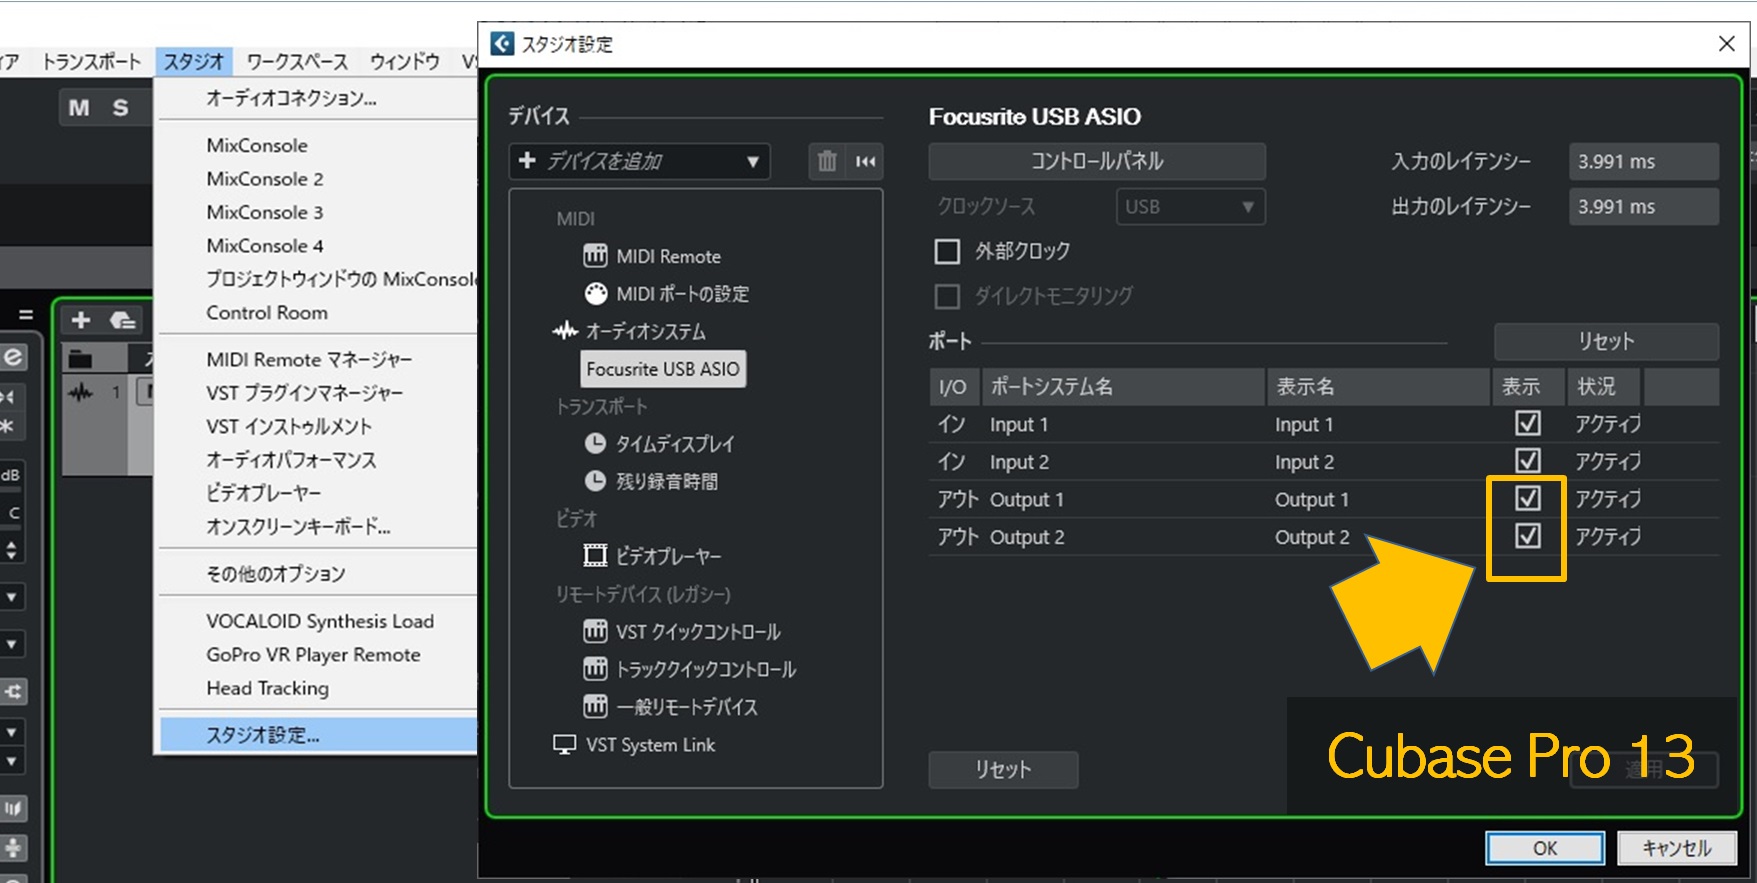
7. Check the output port status
Once you have identified your ASIO driver, make sure the output port it provides is checked.
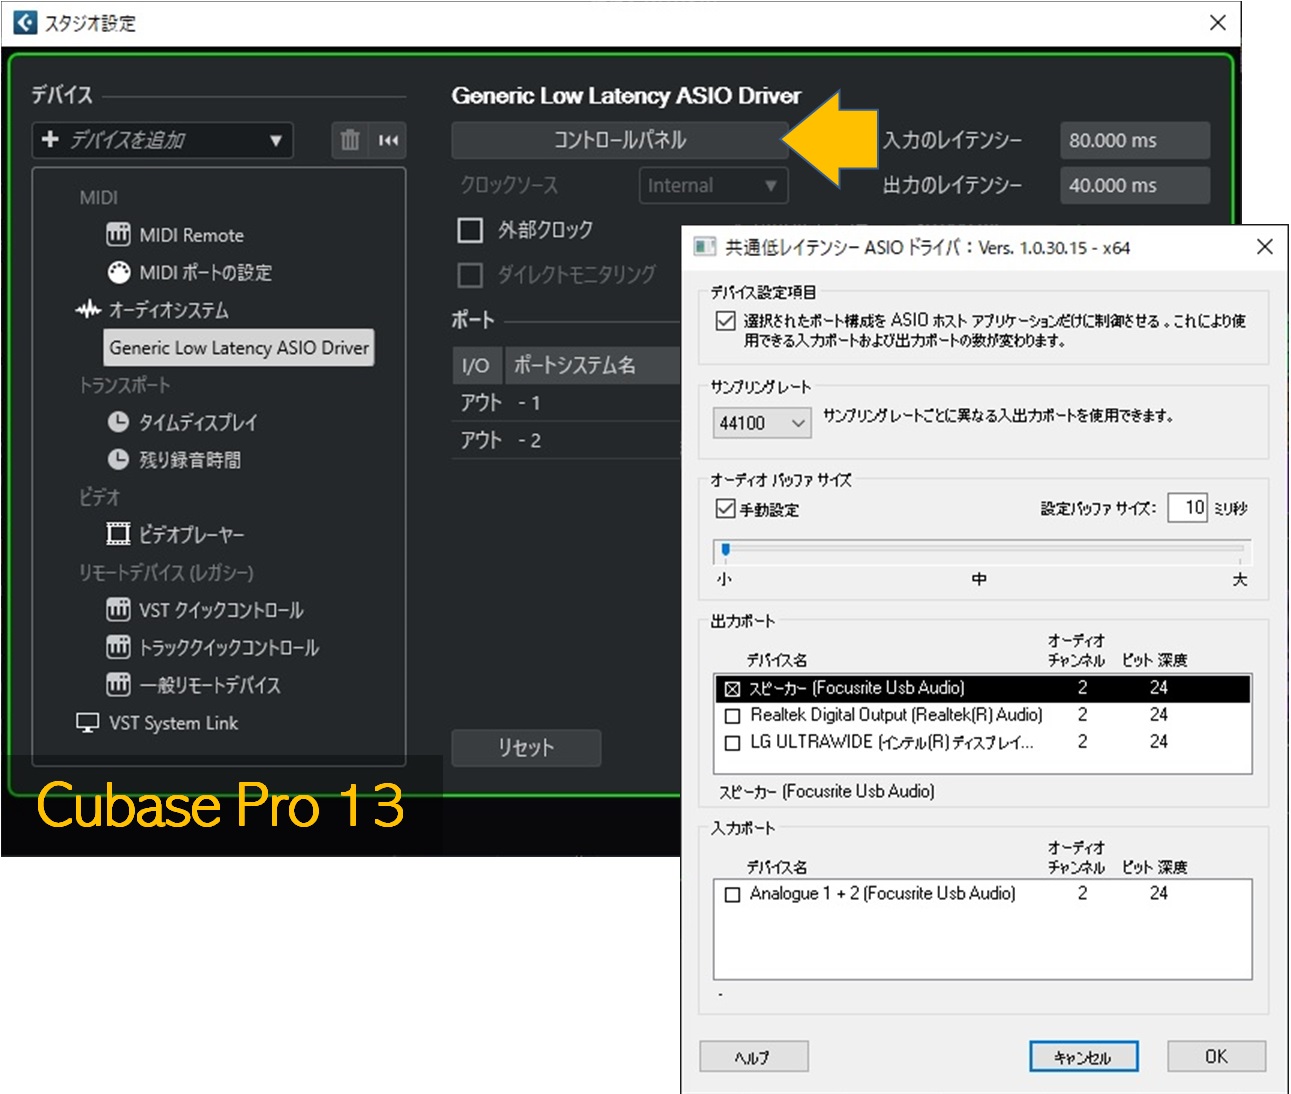
[If the ASIO driver is Generic Low Latency ASIO Driver or Steinberg Built-In ASIO Driver]
If you are using the Generic Low Latency ASIO Driver or Steinberg Built-In ASIO Driver, you may not know which port is being monitored unless you look at the "Control Panel."
The Generic Low Latency ASIO Driver is a generic driver that comes with Cubase. The Steinberg Built-In ASIO Driver is its successor.
 Generic Low Latency ASIO Driver
Steinberg Built-In ASIO Driver
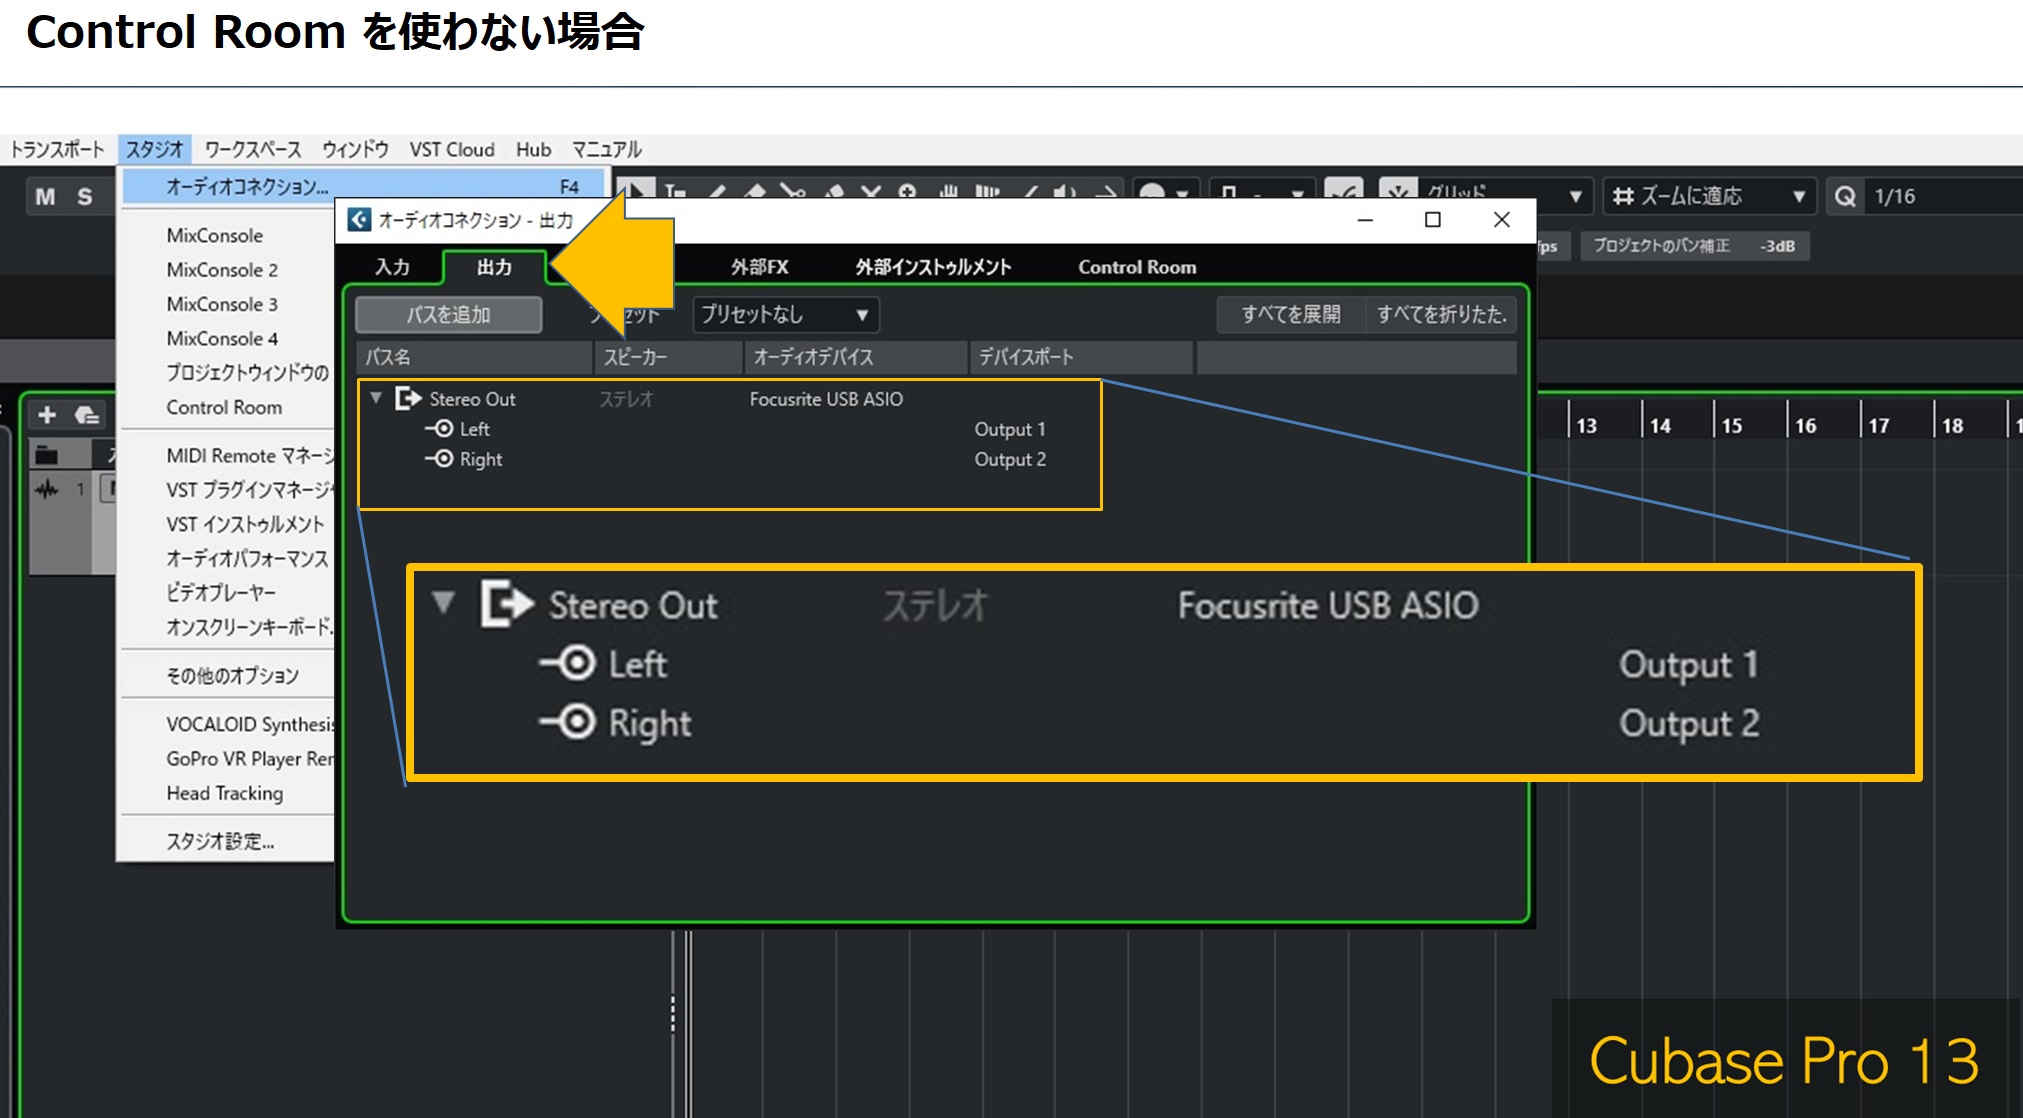
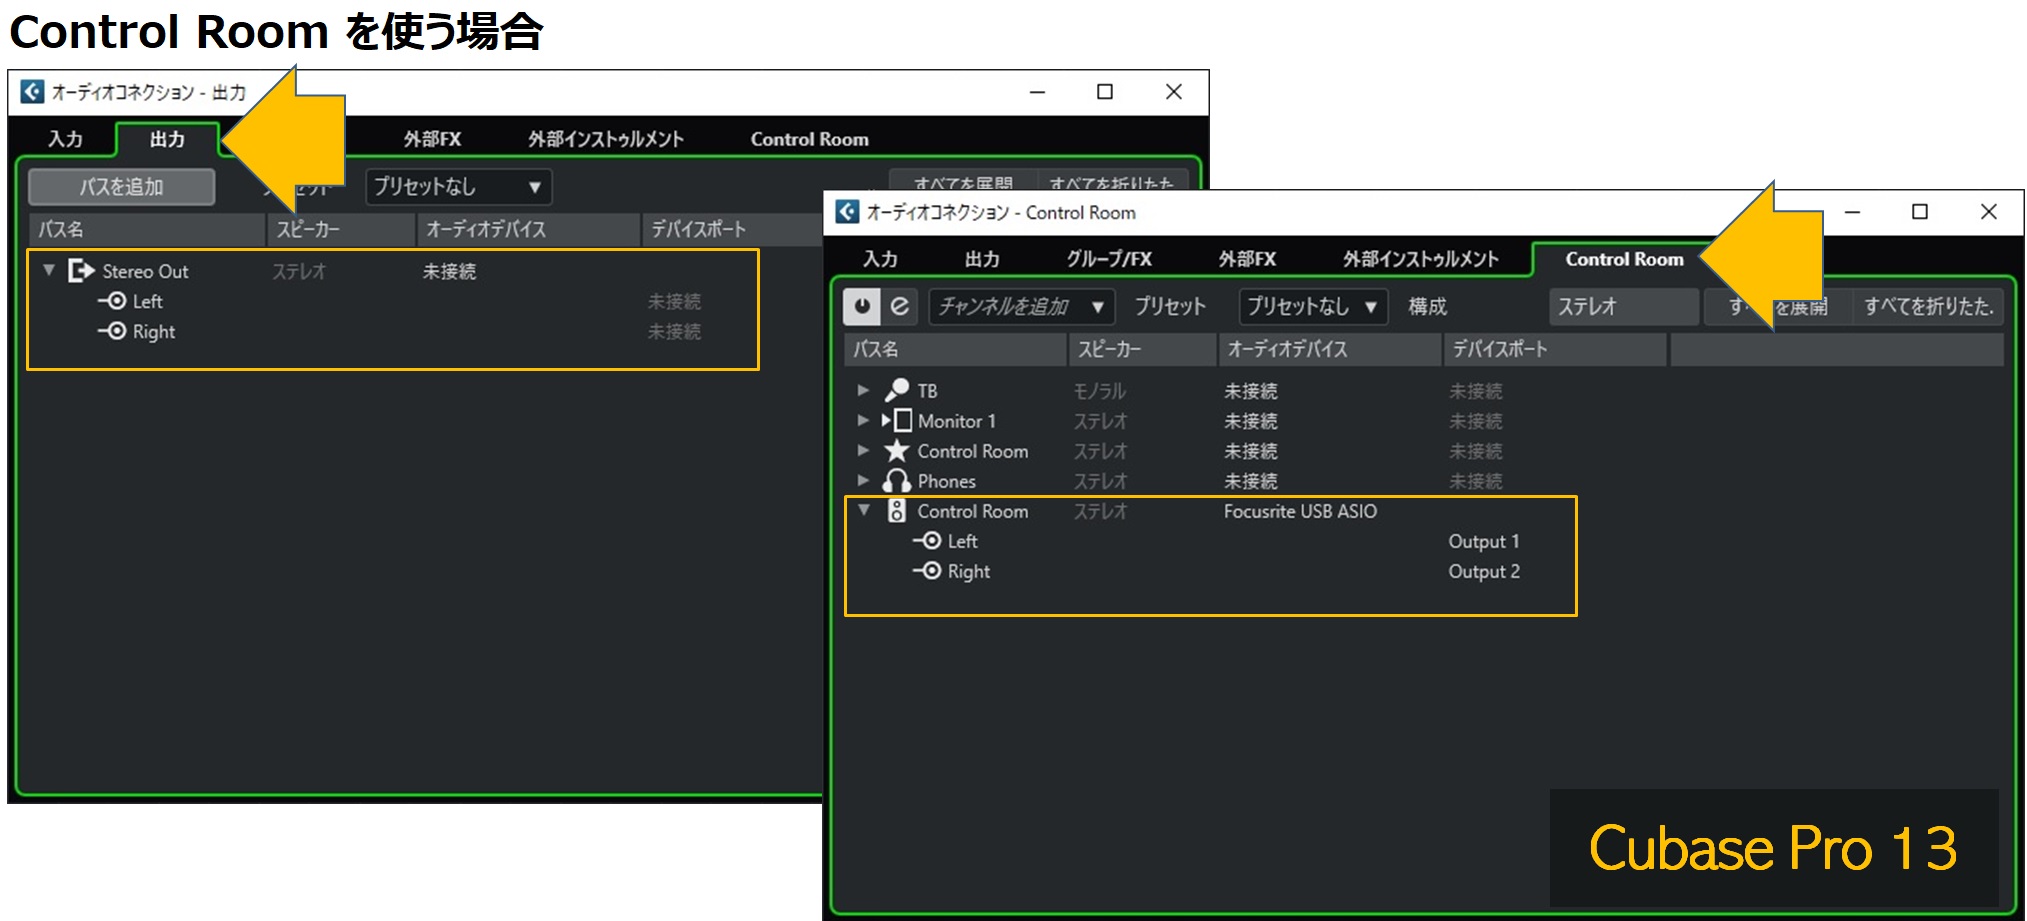
8. Check the definition of Stereo Out
Select "Output" under "Audio Connections" and make sure that Stereo Out is defined and associated with an output port.
The settings are different if you are using Control Room. Even if you are monitoring using Control Room, you need "Stereo Out" (it can be in "unconnected" state).
[Even if it looks fine, it may not actually function] It seems that
the bus defined here may not actually function even if it looks fine. In that case, you may be able to get sound by redefining it with the same content in the "Output" tab and "Control Room" tab.
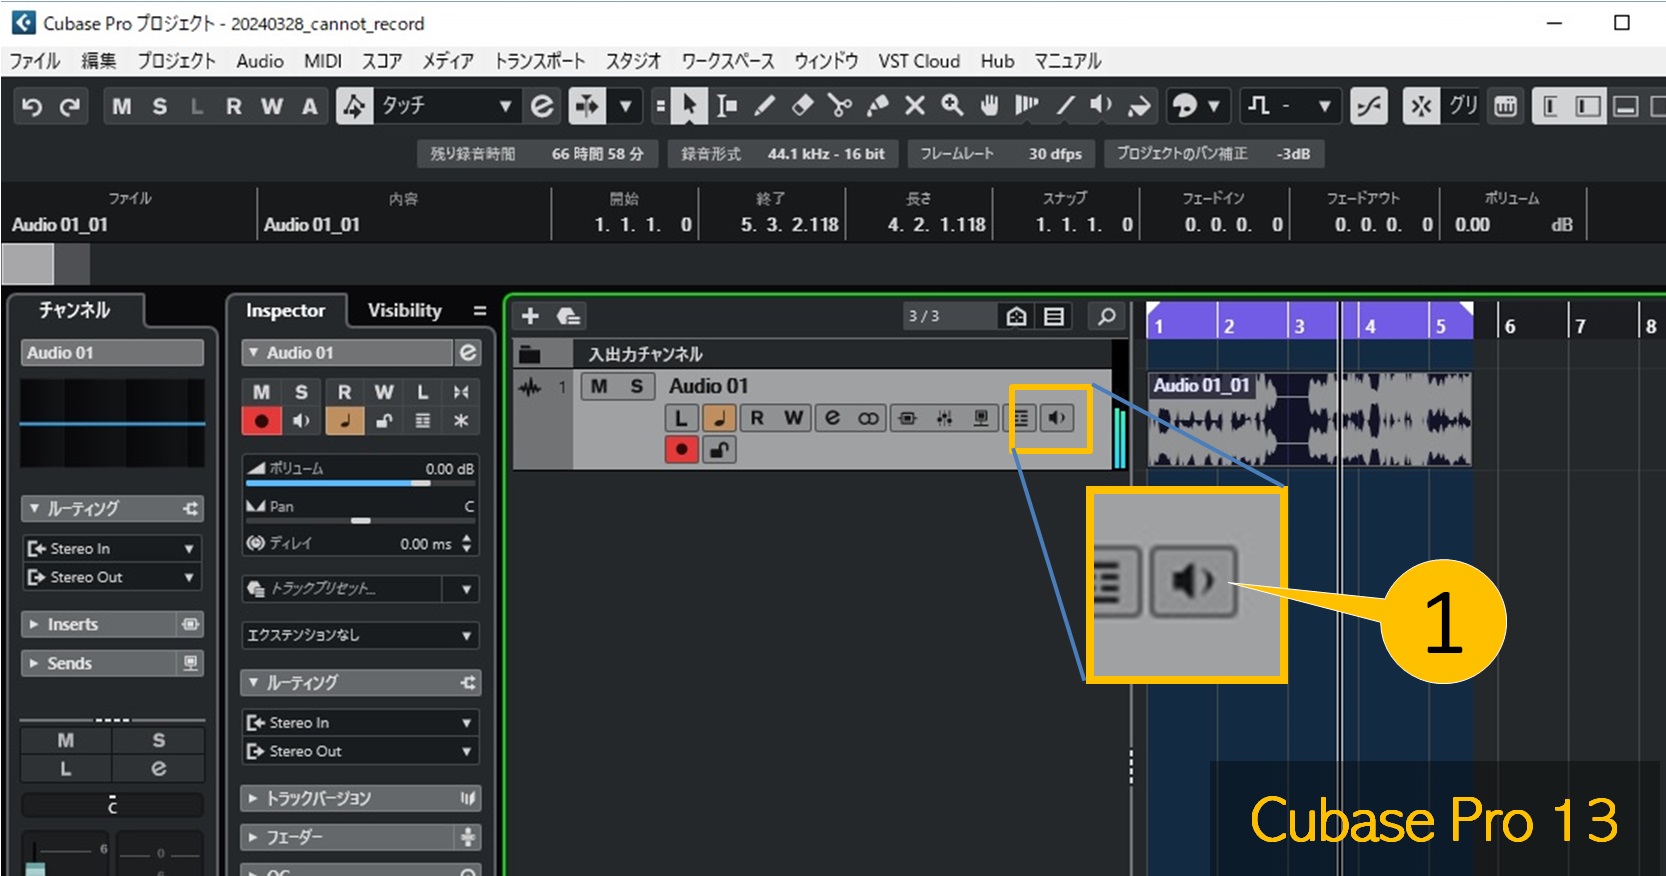
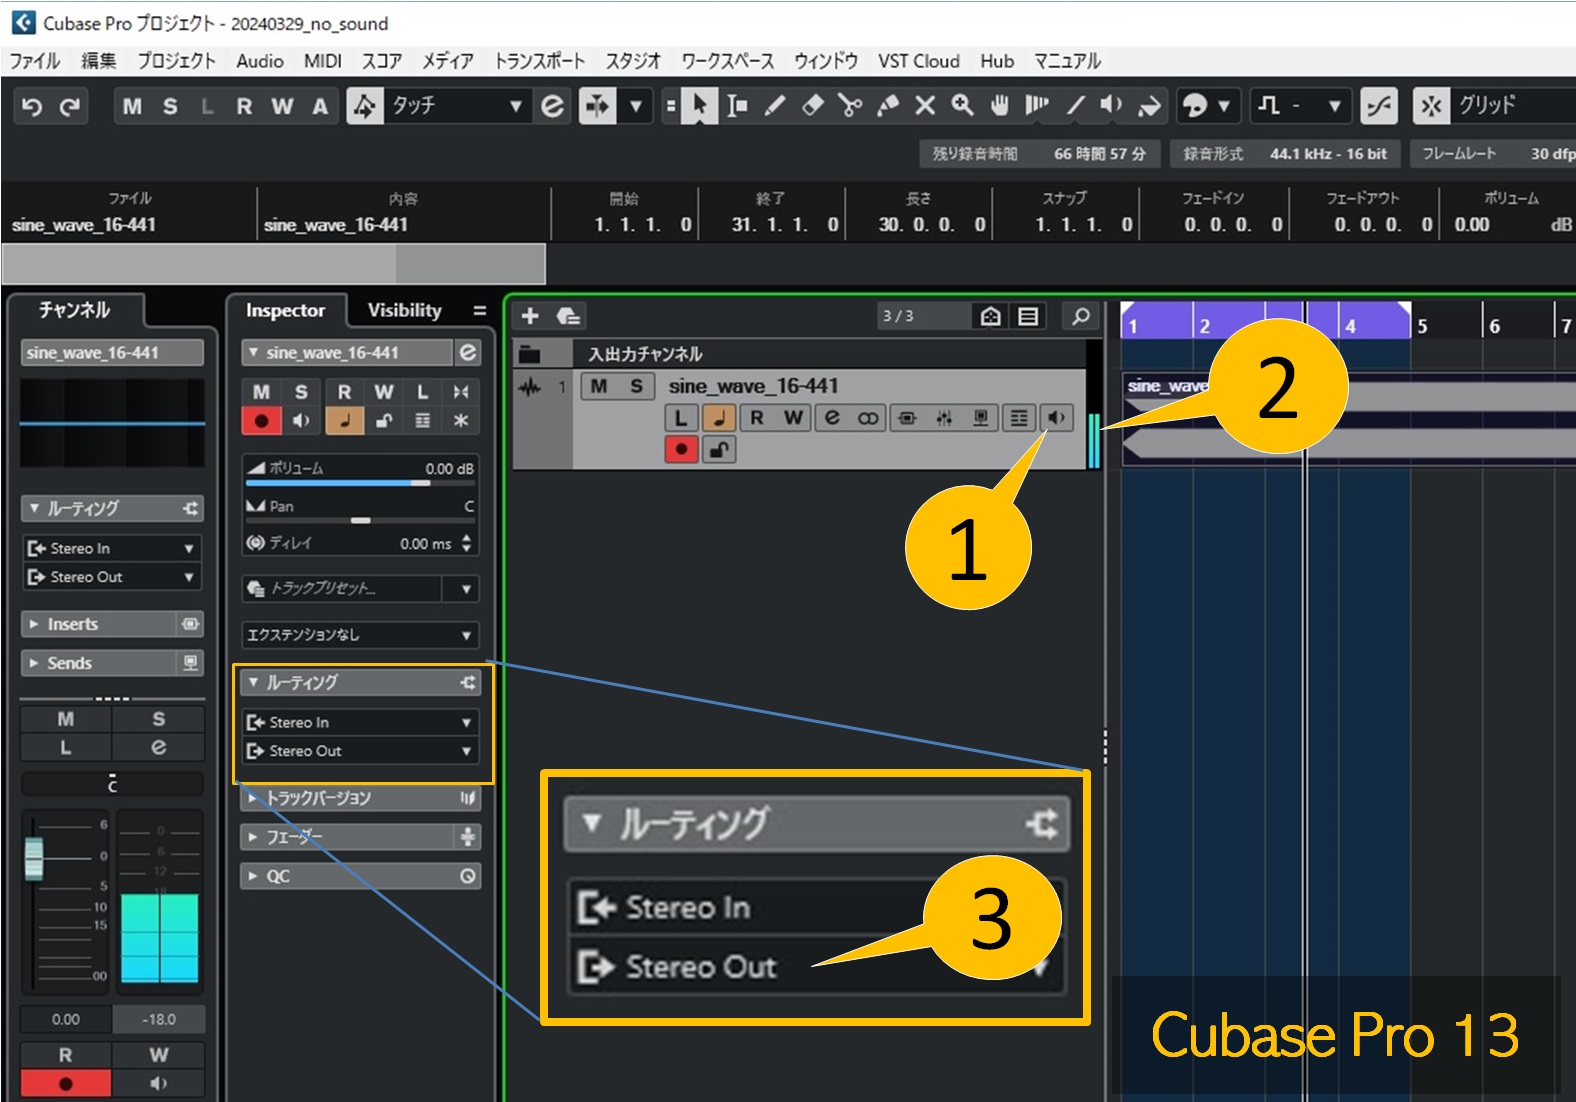
9. Is the track outputting audio?
Check if the recorded track is making sound.
Make sure monitoring is off [1]. If the indicator [2] moves, the track is outputting audio.
If there is no sound, check the output routing [3] in the Routing Inspector. This output bus must be defined in the audio connection.
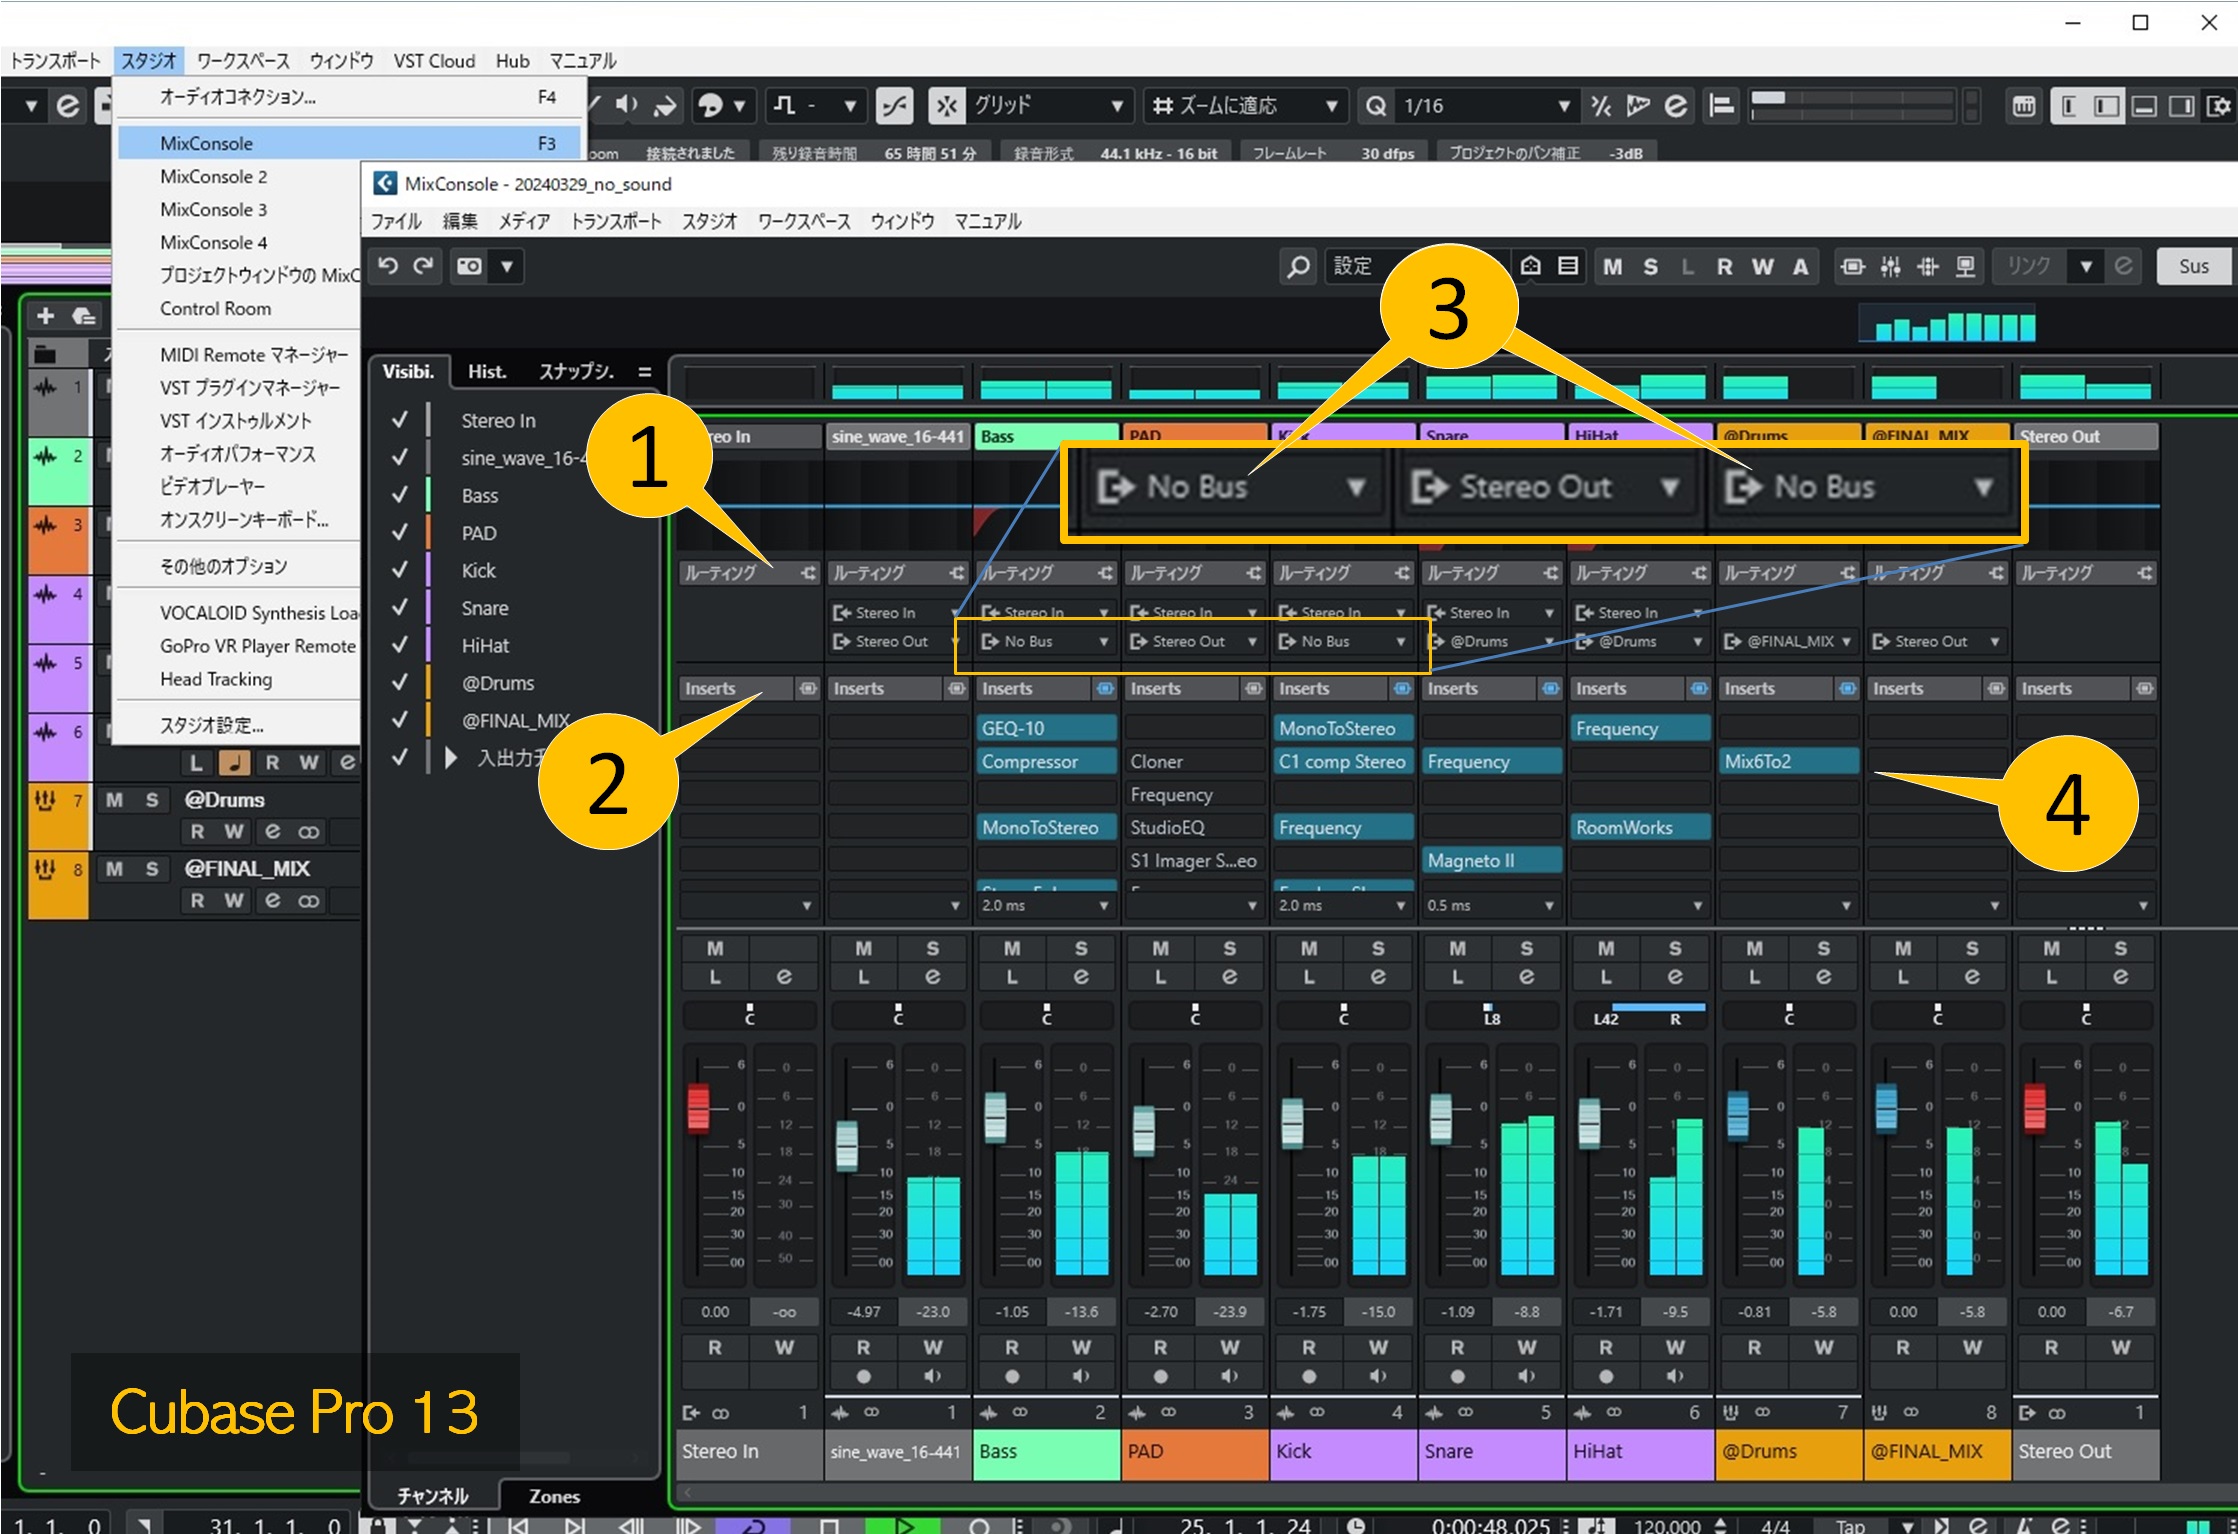
10. Make sure there are no tracks with audio output set to "No Bus"
Using the MixConsole may help you find the problem area.
- Open the MixConsole and click [Routing] [1] and [Inserts] [2] to expand them.
- The audio from the track [3] whose output destination is "No Bus" in the lower row will stop there and will not flow to the Stereo Out. In other words, no sound will be produced.
- If you are using a group channel track, deleting the group channel track will change the output destination of the track that was outputting audio to it to "No bus."
- There may be cases where audio does not play in subsequent processing due to problems with the settings of the plugin [4]: 12. Cases where sound does not play due to a problem with the plugin
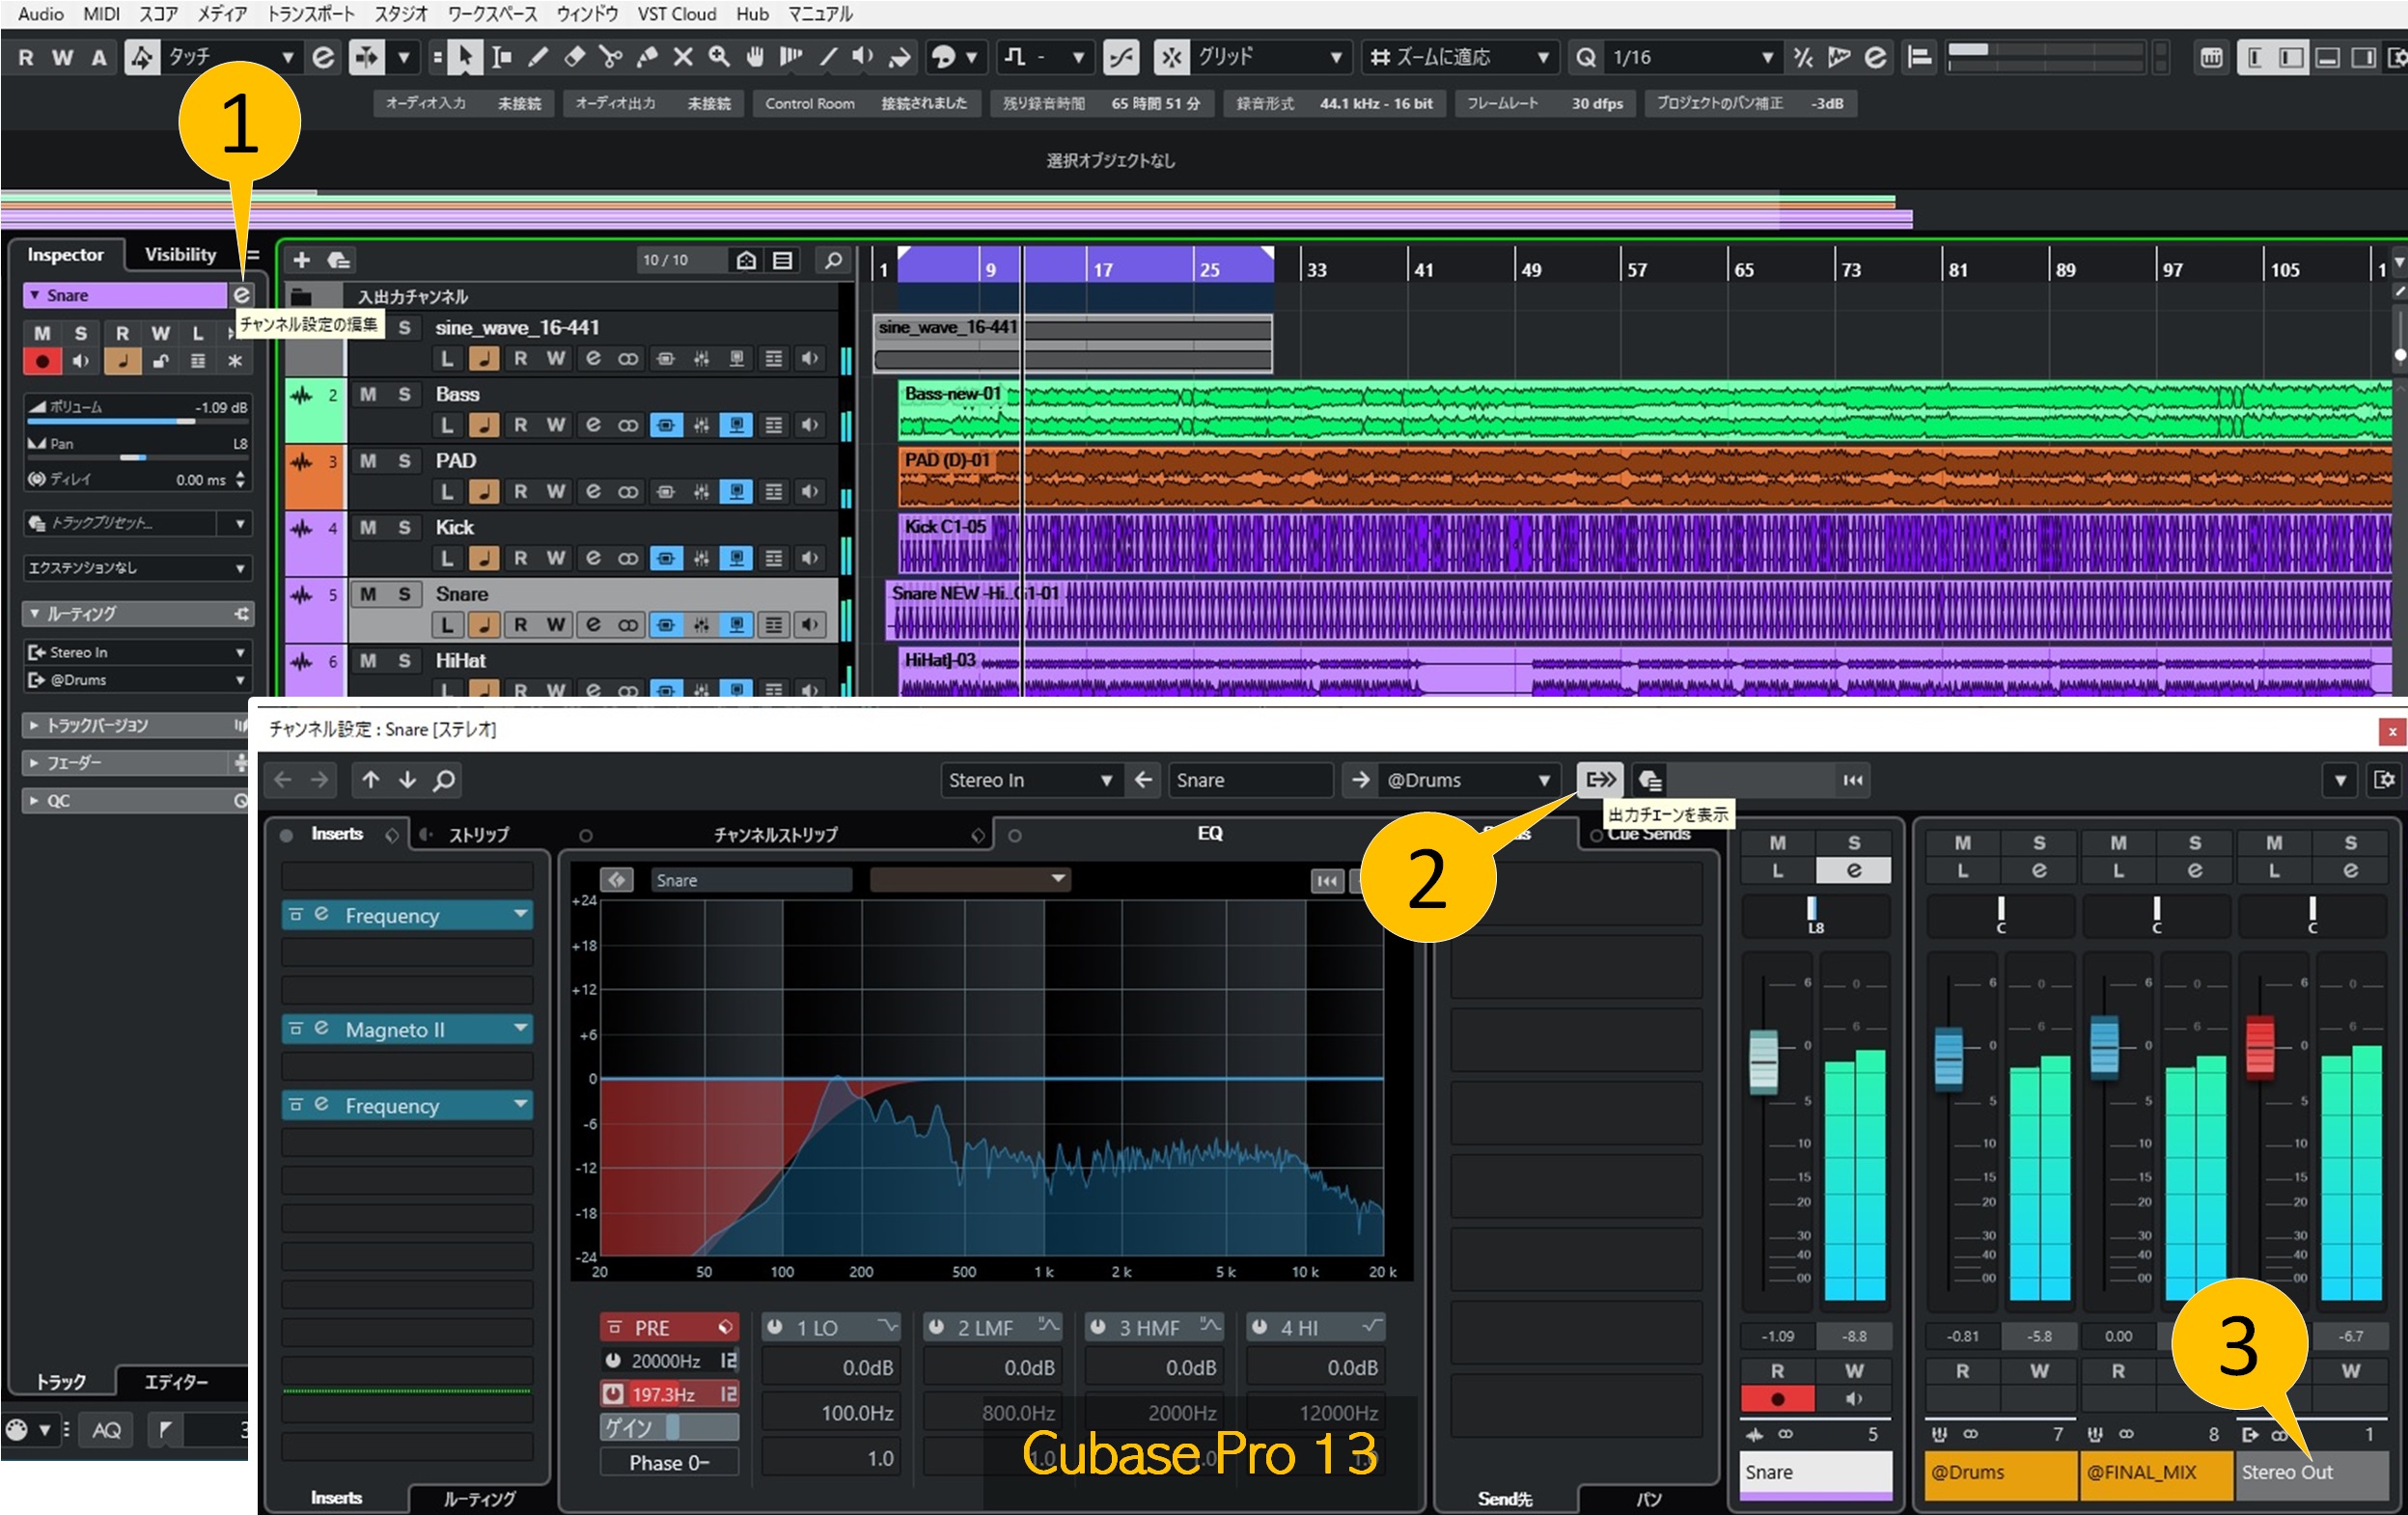
11. Check the audio flow from the track to the Stereo Out
Turning on "Show Output Chain" for the track that is not producing sound will make it easier to check the status of the channels leading to the Stereo Out.
- Open the channel settings panel[1]
- Turn on "Show Output Chain" [2]
(If you can't turn it on, the output destination may be set to "No Bus")
- If the rightmost channel [3] is not Stereo Out, the output destination of the last channel may be set to "No Bus" (in this example, the rightmost channel is Stereo Out, so there is no "No Bus").
- By switching the device to playback mode and watching the level meter movement, you can see how the audio is being transmitted.
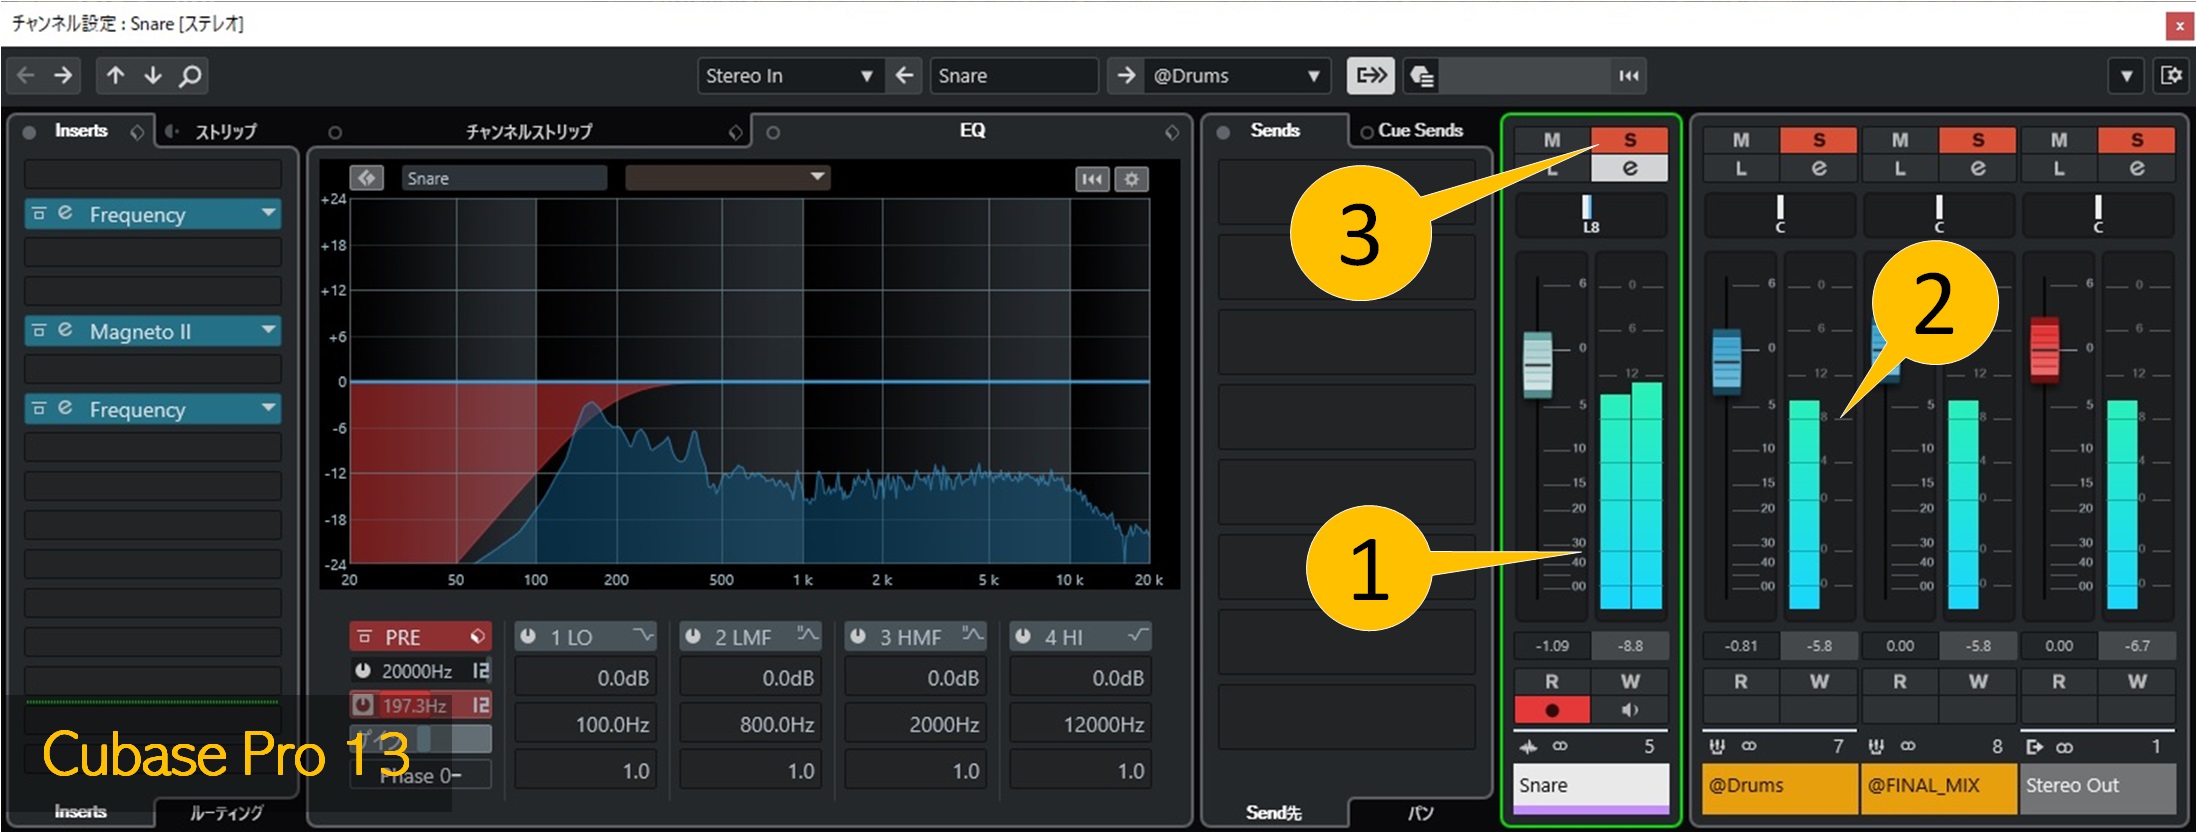
12. No sound due to a problem with a plug-in
There may be a problem with the plug-in settings or the plug-in itself (such as an expired trial period) that causes the audio to be cut off midway.
The image below shows that there is no problem with the output of the track itself [1], but the audio on the right side of the following group channel (@Drums) is cut off [2].
The panpot of the group channel (@Drums) is in the center, so there may be a problem with the plug-in inserted in this channel.
I think it's easier to understand the audio transition if you solo [3].